How to Assemble Modular Office Workstations Step by Step Guide?

Time:2026-06-19 Author:Oliver
0%

As the demand for flexible work environments rises, understanding how to assemble modular office workstations step by step becomes essential. These workstations offer adaptability for different needs. They are easy to configure and reconfigure, making them ideal for modern workplaces. When properly assembled, these stations provide ergonomic benefits and optimize space.

Yet, assembling them can be challenging. It requires attention to detail and some basic skills. You may encounter minor setbacks, like pieces not fitting together as expected. Patience is key. A step-by-step approach ensures each component aligns correctly.

Gather all tools and parts before starting. This preparation helps avoid frustration. Each workstation design varies, so refer to the specific instructions provided. By understanding how to assemble modular office workstations step by step, you not only create a functional space but also gain valuable experience for future projects.
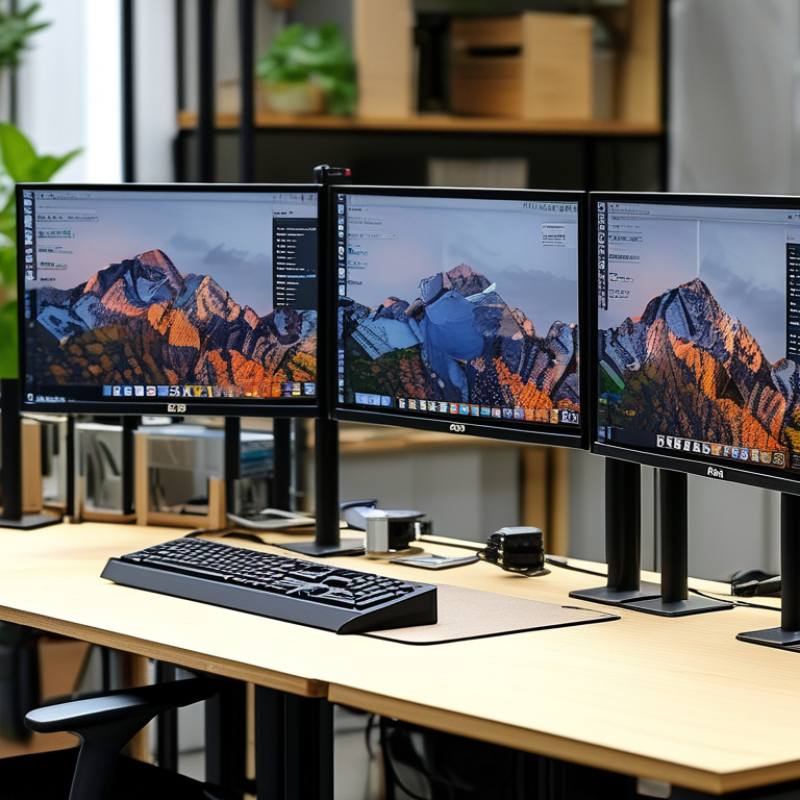
How to Assemble Modular Office Workstations Step by Step Guide?

Choosing the Right Modular Office Workstation Components

Choosing the right components for modular office workstations is crucial. Start with the desks. Look for options that fit your space needs. Consider size and shape. You might choose an L-shaped desk for collaboration. Alternatively, a linear desk works for individual tasks.

Next, focus on storage solutions. Modular workstations benefit from easy access to supplies. File cabinets and shelves are essential. They keep the workspace organized and decluttered. Make sure the colors and materials match for a cohesive look.

Don't ignore technology needs. Power outlets and cable management are vital. Ensure your workstation can accommodate these elements. It’s easy to overlook, but messy cables can lead to frustrations. Invest time in planning to avoid future stress. Every component should enhance productivity and comfort. Each piece must work together seamlessly.

How to Assemble Modular Office Workstations Step by Step Guide? - Choosing the Right Modular Office Workstation Components

Component Description Dimensions (L x W x H) Material Price Range
Desk Panel Main surface for working. 60 x 30 x 1.5 in Melamine $200 - $300
Legs Support structure for the desk. 28 in height Steel $50 - $75
Divider Panels Create privacy between workstations. 50 x 62 in Fabric $100 - $150
Cable Management Tray Hides and organizes cables. 24 x 4 x 4 in Plastic $20 - $30
Office Chair Ergonomic seating for comfort. Adjustable height Mesh/Fabric $150 - $250

Preparing Your Workspace for Assembly

Preparing your workspace for the assembly of modular office workstations is crucial. Start by clearing the area of any clutter. Ensure there’s enough space to move around. A tidy workspace helps in reducing distractions.

Tip: Use painter's tape to outline where each workstation will go. This method visualizes the layout and helps identify potential issues with spacing. For larger areas, consider using a measuring tape to verify dimensions. Accurate measurements ensure a smoother assembly process.

Lighting is also important. Ensure your workspace is well-lit, minimizing shadows. Natural light can boost productivity, so if possible, position workstations near windows. If artificial lighting is needed, use bright, white bulbs for clarity.

Tip: Keep tools and components organized in labeled containers. This step prevents frustration during the assembly process. Putting together modular workstations can have unexpected challenges, such as missing parts or unclear instructions. Prepare for minor setbacks and stay flexible. Approach the project as a learning experience; it’s okay to make mistakes.

Step-by-Step Assembly Instructions for Modular Workstations

Assembling modular office workstations can be a seamless process with the right steps. Reports indicate that over 60% of workers prefer adaptable workspaces. These flexible environments boost productivity and employee satisfaction.

To begin assembly, gather all components and tools. Ensure you have an organized workspace. Clarity in your workspace reduces errors during assembly. Start with the base, which provides stability. Then, attach the walls and panels. This approach allows for easy adjustments later.

Tip: Always check for manufacturer weight limits before adding additional equipment. Avoid overcrowding your workspace, which can lead to a cluttered environment and hinder creativity.

Once the main structure is secure, focus on adding accessories like shelves and monitors. Make sure everything aligns correctly. Uneven workstations can cause frustration. Regularly assess your workstation’s layout to ensure it meets employee needs.

Tip: Periodic evaluations of the layout can reveal areas for improvement. Gather feedback from users to enhance workspace functionality. Remember, a well-organized office promotes a positive atmosphere.

Finishing Touches: Organizing Cables and Accessories

Cable management is often overlooked when assembling modular office workstations. A clean, organized setup can enhance productivity. Start by gathering all cables from your devices. This includes chargers, monitors, and phones. Identify the cables that need organization. Use cable ties or clips to bundle them together. It helps in reducing clutter.

Consider using cable management sleeves for a neater appearance. They can hide unsightly wires and keep them together. Place power strips strategically to minimize visible cords. However, it’s essential to ensure these power strips do not overload. Regular checks are necessary to avoid potential hazards.

Accessorizing your workstation can elevate the overall look. A simple desk organizer can keep important items at hand. Yet, even small additions, like decorative items, can create distractions. Balance aesthetics with functionality. Reflect on what improves your workspace without creating chaos. Strive for simplicity while embracing necessary tools.

Organizing Cables and Accessories in Modular Office Workstations

Testing and Ensuring Stability of the Completed Workstation

Testing your modular office workstation is crucial. After assembly, it’s important to check for stability. Start by gently pushing and pulling each section. Any wobbling indicates a need for adjustment. Pay attention to the joints and connectors. A tight fit is essential for a sturdy setup.

Next, ensure the workstation can support weight. Place manuals, items, or even a laptop on the surface. Test each area. If a section sinks or feels loose, identify where the issue lies. Sometimes, it helps to adjust screws or reposition panels.

Regular checks are key to long-term usability. Monitor the workstation's performance over time. Notice if any parts loosen. Document any necessary repairs you make. This reflection allows you to maintain a reliable workspace. An unstable workstation can hinder productivity, so prioritize these stability tests.

FAQS

: Why is organizing the workspace important during assembly?

: An organized workspace reduces errors and enhances efficiency during assembly.

What should I check before adding extra equipment to my workstation?

Always verify weight limits to avoid overloading any section.

How can I enhance cable management in my workstation?

Use cable ties or clips to bundle cables and minimize clutter.

What is a simple way to improve the look of my workstation?

A desk organizer can help keep essential items accessible without causing chaos.

How do I test the stability of the workstation after assembly?

Gently push and pull each section to check for wobbling or loose joints.

What should I do if a workstation part feels loose?

Adjust screws or reposition panels to stabilize the affected area.

How often should I assess my workstation layout?

Periodic evaluations help identify areas for improvement and gather user feedback.

Why is balancing aesthetics and functionality important?

Strive for simplicity while ensuring necessary tools do not create distractions.

What can happen if the workstation is unstable?

An unstable workstation can hinder productivity and create safety hazards.

How can I reflect on my workstation's effectiveness?

Document repairs and monitor performance over time to maintain reliability.

Conclusion

In the guide titled "How to Assemble Modular Office Workstations Step by Step," readers will learn the essential components needed to create an efficient workspace tailored to their needs. The process begins with choosing the right modular workstation components that align with your workflow and design preferences. Following that, preparing your workspace for assembly is crucial to ensure a smooth installation process.

The article provides detailed step-by-step assembly instructions for modular workstations, making it easy for anyone to follow along. Once assembled, it discusses the importance of adding finishing touches, such as organizing cables and accessories for a clean look. Finally, testing and ensuring the stability of the completed workstation is highlighted to guarantee safety and functionality. This comprehensive guide effectively addresses how to assemble modular office workstations step by step, making it an invaluable resource for those looking to enhance their office environment.

Oliver

Oliver

Oliver is a seasoned marketing professional with a wealth of expertise in driving brand awareness and engagement. With a deep understanding of our company's product offerings, he consistently delivers high-quality content that enriches our professional blog. His insights not only shed light on......